Drying and Environmental Control
- AC unit with CoolBot: Keeps the workspace cold, which is crucial for maintaining hash quality during washing and collection.
- Freeze Dryer
Pressing
- Rosin Press
- Micron rosin bags: Required for pressing hash cleanly and evenly.
How to Make Live Hash Rosin at Home in 10 Steps
Step 1: Select and Prepare Fresh Frozen Plant Material
Time: 30-40 minutes
Selection starts before harvest. Not all plants wash the same, and trichome structure plays a major role in how cleanly resin separates during washing.
When selecting plants, look closely at the trichome texture, not just the amount of frost. Gently rub a trichome-covered sugar leaf between your fingers and lightly massage your fingertips together.
Pay attention to how it feels. Trichomes that feel grainy or sandy tend to separate more cleanly in cold water. These trichomes usually break away from the stalk easily and are simpler to collect during washing.
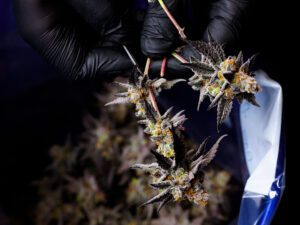
Trichomes that feel slick or oily can still be processed, but they are more difficult to work with. Oily trichomes are more likely to smear, clump, or stick to tools during collection. They have their place, but they require tighter temperature control and more experience to handle cleanly.
Once the plants are selected, harvest and remove only the large fan leaves, leaving the sugar leaves intact. Line a 5-gallon bucket with turkey bags and gently buck the buds and sugar leaves directly into the bag. Once filled, seal the bag and place it straight into the freezer.
Allow the material to freeze for 48 hours before washing. Fully frozen material helps trichome heads snap cleanly off the stalk during agitation rather than smearing, which leads to cleaner separation and easier collection.
Step 2: Prepare the Environment and Ice Water
Time: 1 – 2 hours
Logan and I like to get everything set up the day before our wash, including pre-freezing our freeze dryer trays. We have a five-tray system, so we’ll line each tray with parchment paper and place them into the deep freezer.
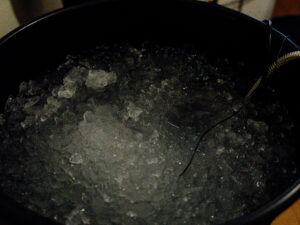
Before washing, chill your workspace as much as possible. Cold temperature control is critical throughout the entire wash. A cool room, cold water, and cold tools help prevent trichomes from softening, smearing, or sticking during agitation and collection. Warm conditions almost always reduce hash quality and make the process more difficult than necessary.
Prepare your water and ice in advance so everything is fully cold before you start. Use the cleanest water you can. Reverse osmosis (RO) water is ideal, but at the very least, it should be free of chlorine and heavy metals, since water quality has a direct impact on aroma and flavor. Ice should also be clean and odor-free, as hash absorbs smells easily.
Starting cold and staying cold creates cleaner separation, gives you more time to collect, and helps maintain the integrity of the trichome heads.
Step 3: Set Up Your Bubble Bags
Time: 15 minutes
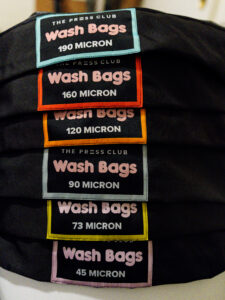
Bubble bags are where separation really happens, so how you stack and use them matters. Always stack your bags from the largest micron on top to the smallest on the bottom. The premium trichome heads are typically found in 73u, 90u, &120u. Take the time to seat each bag evenly so water drains smoothly and doesn’t pool or overflow.
The first time we wash any strain, we use a six-bag setup: 45μm, 73μm, 90μm, 120μm, 160μm, 190μm. We document which bag has the larger collection and adjust our bag stacks accordingly.
Step 4: Load the Wash Vessel and Rehydrate
Time: 10 minutes
The wash vessel is lined with a 220μm wash bag. You’ll load your material into the wash bag and gently add ice across the top, along with ice-cold water. With the plant material completely submerged, gently break it up by hand to ensure there are no frozen blocks.
Allow the material to soak for 10 minutes before washing to fully rehydrate. This softens the plant tissue and helps trichomes separate cleanly during agitation, resulting in cleaner hash.
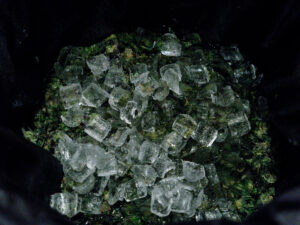
Step 5: Perform the First Gentle Wash
Time: 5 minutes
The first wash should be gentle and done by hand. Lightly press and move the material rather than stirring aggressively. This wash is about hydration and temperature control, not maximum extraction. You want to move all the material around without crushing it against the vessel walls.
Your first gentle wash should be five minutes.
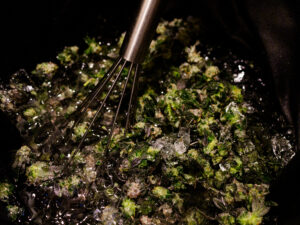
Step 6: Let the Hash Settle
Time: 5 minutes
After agitation, stop and allow the water to sit briefly (five minutes). Trichomes sink while plant material floats. This settling period helps ensure cleaner collection.
Step 7: Drain and Collect the Hash
Time: 30 minutes
Slowly drain the wash water through the bubble bags, keeping everything as cold as possible. As the water runs through, gently rinse the sides of each bag to guide the hash into a clean pile. Work with purpose, but don’t rush. While rinsing, you’ll start using your sprayer to further sieve and refine the hash through the bags.
When it’s time to collect, keep your tray close. Scoop the hash directly onto the tray, separating each micron range as you go so everything stays clearly labeled and organized.
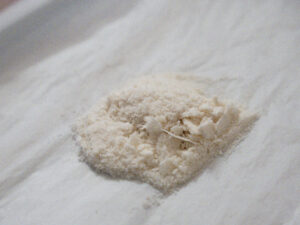
Step 8: Repeat Washes as Needed
Time: 2 – 4 hours
Additional washes can increase overall yield; we aim for 3 to 4 washes each strain. Many hash makers choose to keep the 1st wash separate from later ones. After the first wash, agitation time and pressure are usually increased to pull any remaining trichomes.
That said, there’s a fine line. Excessive agitation can break down plant material and turn your hash green, ultimately reducing quality.
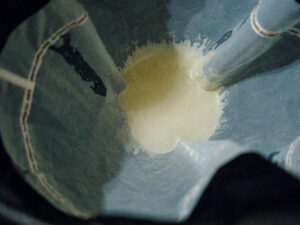
Step 9: Collect and Freeze Dry the Hash
Time: 20 minutes
Once the hash is collected, move it straight onto parchment-lined freeze-dryer trays and spread it out evenly. Try to keep the layer thin and consistent rather than letting it clump up in certain spots. When hash dries unevenly, moisture can get trapped, and that usually shows up later during pressing as bubbling, poor flow, or inconsistent texture. Taking the extra time here makes a noticeable difference.
After the trays are loaded, freeze the hash right away and transfer it to the freeze dryer for 24 hours. Proper freeze-drying removes moisture while keeping the structure, flavor, and overall quality intact.
Step 10: Store or Press the Hash
Time: 30 minutes
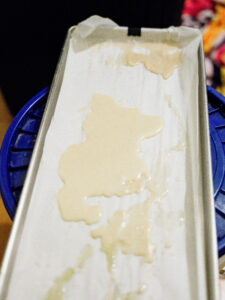
Once freeze-drying is complete, we remove the hash and place it directly into parchment-lined mason jars to keep it dry and protected. From there, it’s ready to be pressed. Before that happens, the hash gets lightly sieved. This breaks up any clumps and makes sure there’s no ice or moisture left hiding in it. Skipping this step usually shows up later.
When loading your press bags, aim to fill them to about 50-75% capacity. It will give the hash room to move without too many restrictions. We like to use 15 μm or 25 μm; whichever we decide, we double-bag it to avoid a blowout. As you’re preparing your press bags, it’s a good practice to warm up your press; we aim for 150-160°F. After your press is heated up and your bags are loaded, line your press with parchment, load your bag onto the press (about halfway back), and start adding slow pressure. Our total time on the plates is roughly 2 ½ minutes, including heat ramp-up. Any longer and you start to degrade your hash.
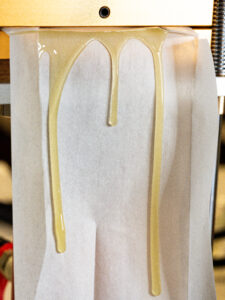
Ultimately, this process is about intention. From harvest to press, every decision affects the final result, and none of it happens by accident. What we’ve shared here is a look at how we approach Live Hash Rosin and why we choose to do things the way we do. It’s not the only way, but it’s a process built through experience, mistakes, and a lot of learning along the way.